
Making A Simple Hooded Bath Towel

Due to "The Blizzard of 2010" my daughter and her family were stuck at our home for an extra day and a half before heading back to Boston after Christmas. 

I took advantage of that time to make some hooded bath towels for my grandsons.  I had already purchased the towels and washcloths, planning to make them as Christmas gifts for the boys, but time got away from me and the supplies sat unused.

I wasn't exactly sure how to make one, but it helped to have my oldest (less wiggly) grandson to serve as a model.  After a few minutes of playing with the washcloth on his head, I came up with a plan.

  First, you need a large bath towel or even a beach towel.  You also need a washcloth that matches or coordinates with the towel.  I bought this set at Marshalls (I think they cost $4.99 and $2.49)


I folded the washcloth in half diagonally.


Then, I found the center point on one long side of the large towel.  I pinned the pointed part of the washcloth to the center of the towel edge, with one side of the washcloth on either side of the towel.  I pinned the two sides of the washcloths that were open, leaving the folded side alone.


I stitched along the edges of the washcloth, making sure the towel was secured within the stitching.  I flipped the towel over and stitched the other side as well.  The washcloths I used were not perfectly squared, so they did match up perfectly.  By stitching on both sides, I was assured that all of the washcloth was stitched down.


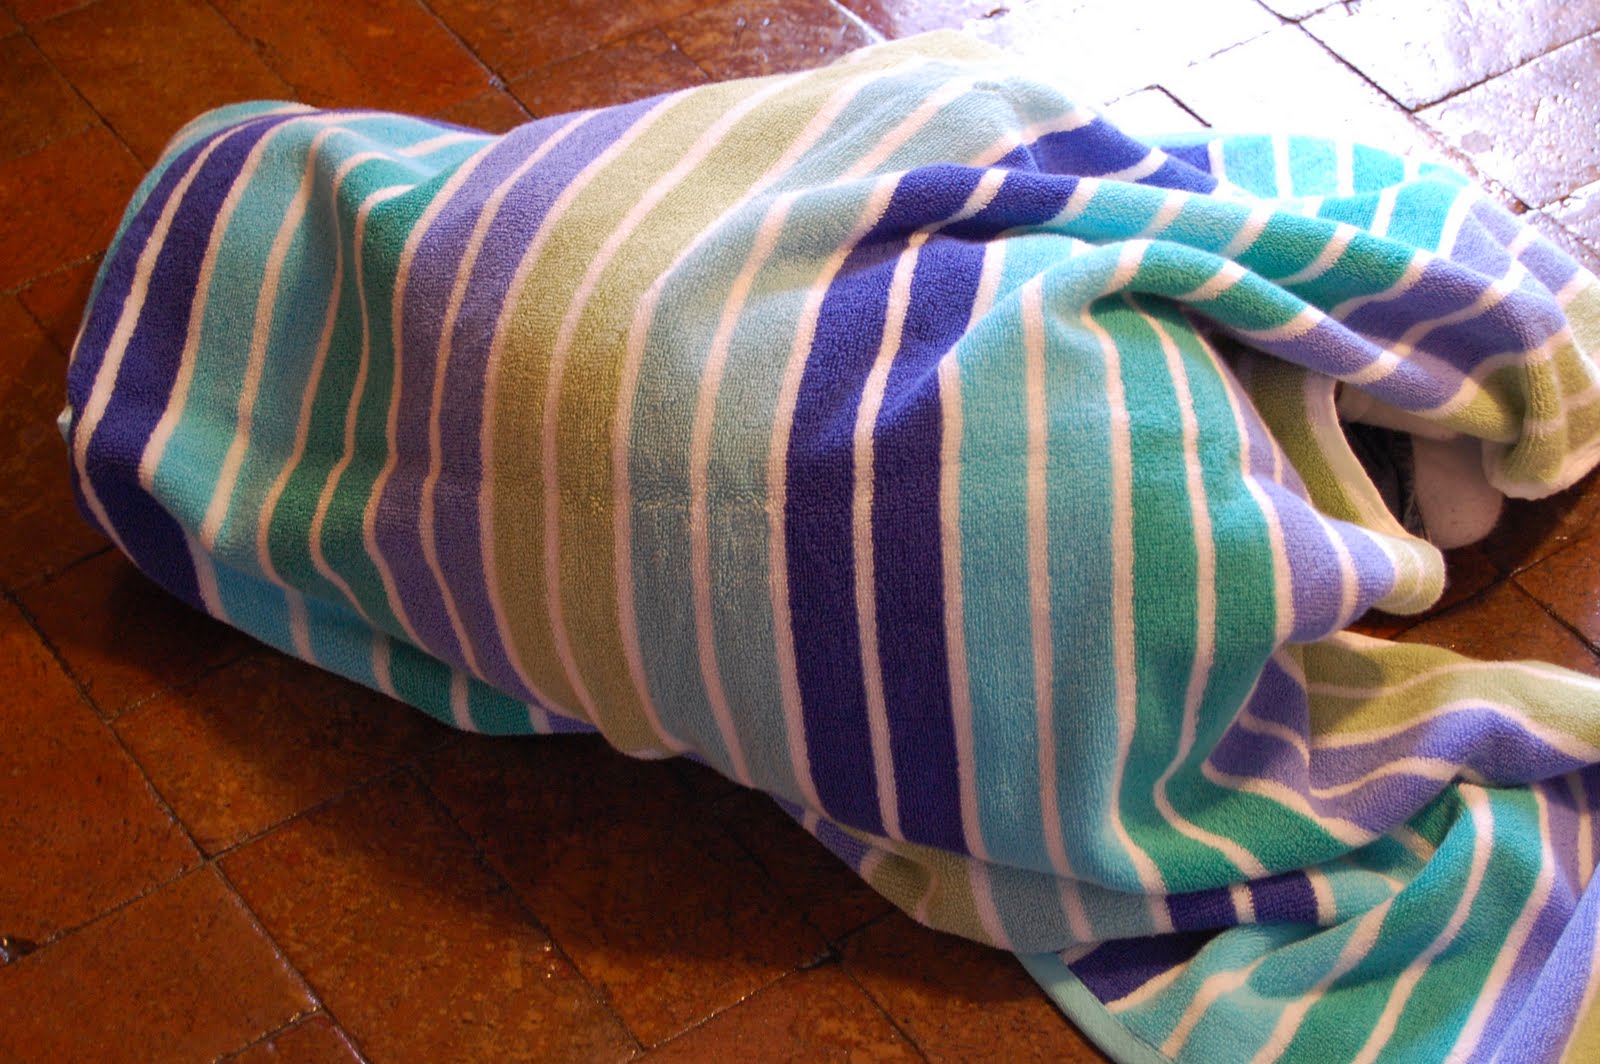
Somebody loves his hooded towel.  In fact, as soon as he was wrapped up in it, he plopped down to show me how snugly he would be after his next bath.


I also purchased a set from World Market which was orange on one side and yellow on the other.


I followed the same directions as above.

I think he likes his too!  Well, I'm thankful for the opportunity to get this project done - and spend some extra time with the ones I love.  It took me less than 1/2 hour to complete both towels, and that included the time it took me to figure out the sewing plan.

I'm linking up with:
Make it Yours @ My Backyard Eden

Comments

  1. Those are super cute! I'll have to read your instructions over about a hundred more times before I attempt it, but I'm totally going to attempt it!

    ReplyDelete

Post a Comment

I'd love to know what you're thinking. Please feel free to leave ideas and comments.

Popular posts from this blog

How To Make Your Own Exercise Bike For Next To Nothing

Remember back in April when I had a kidney transplant?  Well, the kidney is doing great (thanks, Cathy , for taking such good care of it when you owned it).  There was one little glitch, however.  During surgery, the retractors they used caused some nerve damage in my right leg.  When I woke up from surgery, I couldn't move or feel my leg.  The docs felt like the feeling would come back but the paralysis had them stumped.  A visit to a neurologist ruled out a stroke and a CT scan showed some fluid which was pressing on L4 and L5 (medical talk which means I couldn't feel or move part of my leg).  The prognosis is good and I'm recovering pretty quickly.  In fact, I've left my cane behind and I'm walking freestyle without falling.  My next goal is to be able to drive. I've been itching to get back to exercising (physical therapy doesn't count) because my medication causes me to gain weight and I need to burn some calories.  Running? - nope.  Walking? - can&

A Designer's Secret For A Taller Bed

  Several years ago Hubs and I spent almost a year looking for a bedroom set that we both loved.  He wanted clean lines and dark wood.  I wanted curves and a "tall" bed.  Of course, there was no perfect bedroom set but we were able to compromise on a set that we both liked.  My main wish was for a bed that I could "climb up into".  The problem with that wish was that most of the "tall" beds were four poster beds and Hubs was not in the mood for that.  We found a Thomasville bed on display at a local furniture store and it fit the clean lines that Hubs wanted and it was "tall"  enough to suit me.  The problem was that once we received the bed we ordered in our home, it wasn't as tall as I had remembered it being.  My heart sunk!  I went back to the furniture store to look at the display.  Their bed was much taller than our bed.  Hmmm. . . what was different? I got nosey and lifted up the comforter on the bed.  It revealed their secret

Plans For A DIY Exercise Bike Stand

  Thank you to so many of you who emailed me about plans for the DIY Exercise Bike Stand .  I apologize that it has taken me so long to get the measurements to you, but they are finally here!   The wood was purchased at Home Depot and the bike pegs were purchased at Walmart in the bike section.    The bike we used for this project is a 24" 12 speed bike (I'm a shorty).  I used the hardest gear while riding, but this set-up does not allow you to really get much resistance (for building muscle).  It was great for getting my legs moving after some nerve damage.  I also wanted to burn calories and get my heart rate up and this did the trick.    If you have any questions, just shoot me an email.