
Sewing projects galore


We're expecting a baby girl cousin to be born any day now and I just finished a cute quilt for her.  I made a little gift bag with the leftover fabric.  The bag can be used later for her to store some toys in.


The lighting was not cooperating today (or maybe it's the photographer's poor skills) so these pics are a bit dark.  But, anywho, here's the quilt I made.


My favorite detail is the flower trim I added at the seams of the strips.  This trim came from my grandmother many years ago and I was finally able to use it.  I think she would be pleased that it adorns a quilt made for her great granddaughter.


I had a great time making these pillows for my Etsy shop.  The black fabric is actually an upcycled corduroy skirt that a friend gave me. The back side of the larger pillow is black houndstooth check fabric upcycled from another skirt.  I found the doilies at thrift stores.  I've never seen a silhouette doily before.  I thought it was pretty cool.


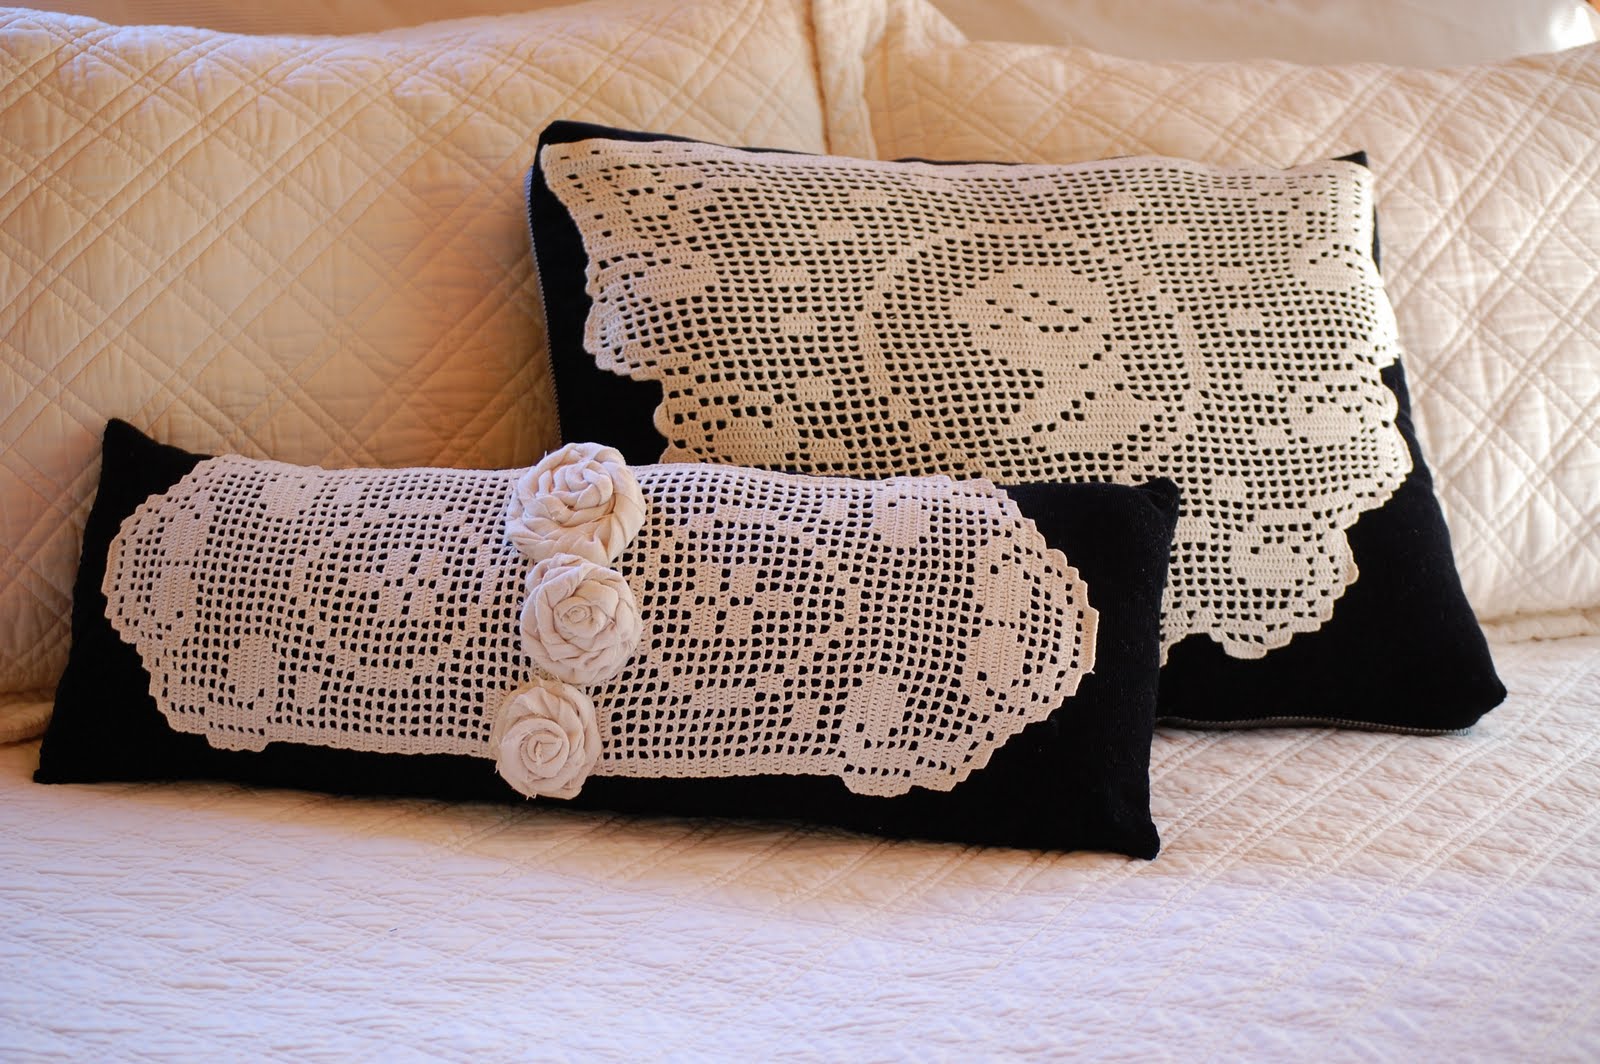
I learned how to make these shabby cotton roses.  They are covering up where I attached two separate doilies together to make one large one.  


I also made two aprons for wedding shower presents but I was in such a rush to finish them that I didn't get any pictures. 

Now, I can start on this pile of fabric (actually they are all skirts, shirts, and pillow cases) to make more aprons and items for my Etsy shop.


Well, I'd better get off of the computer and back into the crafting room.  Don't forget about the Baby Button Nest give-away.  It ends on Tuesday.

Comments

  1. What a beautiful little quilt! The strips and little flowers are adorable! And the bag is a great idea!

    Can't wait to get back to my machine and sew...means I get to sit and work at the same time as opposed to standing at a 'canner'.

    Have a good day!

    ReplyDelete
  2. I love the quilt, especially the daisy trim and the history. Cute bag too!

    And, VERY cute pillows! You are so creative.

    ReplyDelete

Post a Comment

I'd love to know what you're thinking. Please feel free to leave ideas and comments.

Popular posts from this blog

How To Make Your Own Exercise Bike For Next To Nothing

Remember back in April when I had a kidney transplant?  Well, the kidney is doing great (thanks, Cathy , for taking such good care of it when you owned it).  There was one little glitch, however.  During surgery, the retractors they used caused some nerve damage in my right leg.  When I woke up from surgery, I couldn't move or feel my leg.  The docs felt like the feeling would come back but the paralysis had them stumped.  A visit to a neurologist ruled out a stroke and a CT scan showed some fluid which was pressing on L4 and L5 (medical talk which means I couldn't feel or move part of my leg).  The prognosis is good and I'm recovering pretty quickly.  In fact, I've left my cane behind and I'm walking freestyle without falling.  My next goal is to be able to drive. I've been itching to get back to exercising (physical therapy doesn't count) because my medication causes me to gain weight and I need to burn some calories.  Running? - nope.  Walking? - can&

A Designer's Secret For A Taller Bed

  Several years ago Hubs and I spent almost a year looking for a bedroom set that we both loved.  He wanted clean lines and dark wood.  I wanted curves and a "tall" bed.  Of course, there was no perfect bedroom set but we were able to compromise on a set that we both liked.  My main wish was for a bed that I could "climb up into".  The problem with that wish was that most of the "tall" beds were four poster beds and Hubs was not in the mood for that.  We found a Thomasville bed on display at a local furniture store and it fit the clean lines that Hubs wanted and it was "tall"  enough to suit me.  The problem was that once we received the bed we ordered in our home, it wasn't as tall as I had remembered it being.  My heart sunk!  I went back to the furniture store to look at the display.  Their bed was much taller than our bed.  Hmmm. . . what was different? I got nosey and lifted up the comforter on the bed.  It revealed their secret

Plans For A DIY Exercise Bike Stand

  Thank you to so many of you who emailed me about plans for the DIY Exercise Bike Stand .  I apologize that it has taken me so long to get the measurements to you, but they are finally here!   The wood was purchased at Home Depot and the bike pegs were purchased at Walmart in the bike section.    The bike we used for this project is a 24" 12 speed bike (I'm a shorty).  I used the hardest gear while riding, but this set-up does not allow you to really get much resistance (for building muscle).  It was great for getting my legs moving after some nerve damage.  I also wanted to burn calories and get my heart rate up and this did the trick.    If you have any questions, just shoot me an email.