It's that time of year when we need to go through our closets and purge out the old clothes and prepare for the new ones. Sometimes it can be overwhelming to try and clean out your closets. I'm going to take you through the process, step by step.
1. De-clutter your bedroom. Make your bed (it will be a work surface), and clear the floor of all items that have nothing to do with your clothes. You don't want to try to organize on top of clutter.
2. Take out each item of clothing and place it in a pile according to the type of garment it is. Example: shirts, pants, dresses, skirts, jackets
3. Don't sort shoes or accessories yet-that will come later.
4. Go through one pile of clothes at a time. Start with the smallest pile first. Take away any clothes that are too small, too big, too ugly, too old, wrong color, wrong style, wrong decade. It helps to have an honest friend with you to help you make these decisions. If you're not sure about the item, try it on. If you decide to keep it, hang it up in your closet. If you decide to get rid of it, put it immediately into a box or opaque bag to go to the donation center.
5. Pick the next pile and go through the same process. If you have a lot of one type of clothing (like shirts), make separate piles for each color or style (blue, button down, long sleeve etc.). It will help you to make a better decision when you see that you have 5 white, long-sleeved shirts. Pick your 2 favorite shirts and donate the rest.
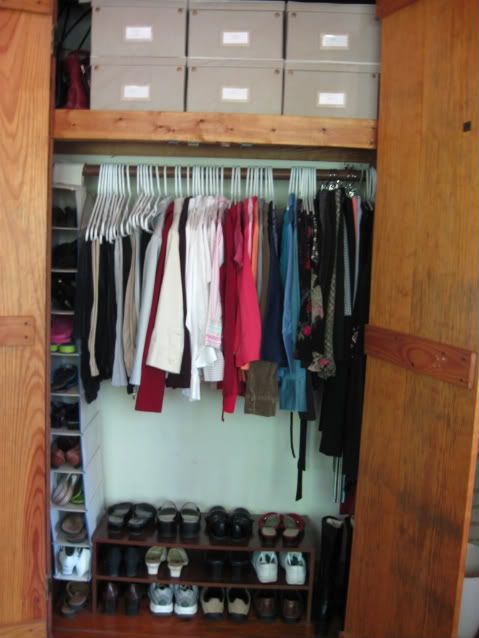
6. I love the look of my closet when all of my hangers are the same style and color. You don't have to spend a lot of money to get the nice look. Cheap, white, plastic hangers are available for around 10 cents apiece. That small investment really is worth the effort.
7. When you hang your clothes back in the closet, hang each type of clothing together. It will make getting dressed in the morning go much faster.
8. Repeat the sorting/purging routine with your shoes. Remember that you can only wear 1 pair of shoes at a time. You don't need to have 40 pair of shoes, 10 of which are brown leather loafers. I'll get off of my soap-box now.
9. Repeat the process with your belts, scarves, purses, and anything else you store in your closet. Oh, by the way, if you have items in your closet that shouldn't be there, now is the time to move them to another place. Just set them outside your bedroom door until you can put them away later.
10. Now, on to your dresser. Go through each drawer, sorting as you go. Try to keep only 1 drawer for each different type of clothing.
11. If something is too worn and needs to be replaced, write a list of items you need to buy. I'll always remember what my grandma used to tell me: "Always wear nice underwear in case you are in an accident and they have to cut your clothes off of you in the emergency room". I swear she said that!!
12. In my dresser drawers, I have small dividers to seperate socks, underwear, bras, and slips. In my husbands sock drawer, I have used my children's shoe boxes from when they were little to separate his socks. The smaller boxes are the perfect size and my husband, who is color blind, can find the proper color sock without my help.
13. For those who "love" to organize, like me, I use my labeler to put small labels inside the rim of the drawer. It helps my husband to find what he needs without rummaging through the whole drawer. For example, I have labeled "long-sleeved t-shirts", "short-sleeved t-shirts", and "grubby shirts" (to be worn to do yard work).
This whole process should be done twice a year-Spring and Fall. The more often you do it, the faster and easier it will be. Don't make any excuses. If you need to, work on one small area at a time. If you get stuck, e-mail me and I'll talk you through it. tidybrownwren@gmail.com
I feel so virtuous. I do this every season! YAY! Okay, so maybe I DID get some of my dad's OCD after all. ;-)
ReplyDeleteI don't go so far as to keep my socks and underwear neat and divided. I need to do that, though. That drawer drives me NUTS.
Great post. I put this chore on my list for the last three Saturdays, but now I'm looking forward to doing it! Thanks!
ReplyDelete