
If you've been following this blog for awhile, you're familiar with Monday Motivation. Monday Motivation was a prompt to help you clean and organize your home - one room/area at a time. By the end of the year, we had gone through the entire house (including the car) and purged, sorted, and organized. I've decided to include these posts, once a month, for those who want to continue through their home again. I'll be doing this in my home too. I've already started on my foyer closet!
The first Monday Motivation post of 2011:
This is this first
post of 2011 that deals with decluttering and organizing our homes. Since
we're moving in an organized fashion, we'll start with the front door.

When people enter your home through your front door, what do they see first? Piles? Shoes? Stacks of Papers? Maybe you don't even have a real entrance, like a foyer, in your home. If you don't, can you improvise by placing a short bookcase or sofa table perpendicular to the door to make a mock entrance?

(Here is a photo I found of a bookshelf that
one family built in but you could also use a freestanding one as
well)
Perhaps your family enters your home through the garage or back door. That area needs to function as well.
First impressions are important for guests, but think about you and your family too. Does your family come home to a mess every day? Do they have a place to put their belongings when they come home to roost? That's what we'll work on today.
Here are steps to help you work on this:
1. Stand at your front door and take a good hard look at the entrance to your home. Ask yourself these questions. . .
a. Does my front door look welcoming?
b. Is this area too crowded to function properly?
c. What seems to cause the biggest mess in this area?
2. Decide what activities need to be represented in this area. Coat storage? Shoe storage? Key storage?
3. Check to see if you have a place for every activity. Do you have a closet or hooks for coats? A bench for shoes? A hook or bowl for keys?
4. Remove any items that aren't needed in the area and store somewhere else in your home (or even better, get rid of it).
5. Look for things that will help this area function better. Perhaps you have a small bench in your kitchen that can function as a place to sit and remove shoes. Maybe a small table in your bedroom can be used to hold keys and the dog leash. Window shoping might be needed to pick out a set of hooks to hold coats or a new door mat. (tip: hold off buying anything until you have weeded out and decluttered the area)
Today we're only looking at the function and "hardscape" of the entrance. The rest of the Monday Motivations in January will be devoted to weeding out belongings and making the area function properly.
Now. . . go forth. . . and organize!
_______________________________________________________________________
This week's Monday Motivation is a continuation from last week. Have you
already done the first
step in organizing your entry way?
With step one out of the way we'll start step two - cleaning out the coat closet. Because I've already blogged about this step before, I just copied it to this post (no reason to reinvent the wheel). I've updated the links so everything should work.

I like the look of this functional coat closet from REAL SIMPLE. I think most of us struggle with keeping the coat closet tidy because during the cooler months that closet is in constant use. I think this week is a good time to purge the clutter and organize the useful.
1. Start with the top shelf. Take everything out and sort like items with like (hats with hats, gloves with gloves, etc.)
2. Go through each pile and remove items that are worn out, don't fit, or you don't like any more. Put any items that are still useful into a bag for the thrift store or homeless shelter.
3. Gather containers that you can use as a drawer/bin for each of the groups of items you have. I have one for gloves, one for hats and scarves, and one for tote bags.
4. Now, do steps 1 and 2 with the clothes that are hanging on the rod.
5. Place clothing back onto the rod according the person they belong to. For example, start with your smallest person. Hang up all of their coats on the left side of the bar. Then, go to the next tallest person. Hang up all of their coats to the right of the previous person's coats. Continue on to the tallest persons's coats. This will give you extra floor space to the left of your closet.
6. Next, gather everything from the floor of the closet and go through steps 1, 2, and 3. This would be a good time to vaccuum the floor and baseboards. Also, check for any mold that may have grown in the dark depths of the closet when you weren't looking (Ewwwww). Wipe it down with a bleach cleaner and let it dry thoroughly.
7. If you need to store shoes in the closet, place an extra door mat or a shoe tray on the floor to catch any dirt or rain/snow drips from the shoes.
8. If you're in the mood to make some improvements to the closet, you can add some hooks to the door or use an over-the-door hanger to hold an organizer. There are many to choose from. Here is one I like and here's another good idea.
I like the double rods in the picture above. It would work well if you only had shorter coats. Long coats would hand down over the bottom rod. I also like the rolling bin. It would be good for back packs and re-usable grocery bags. If you only have one pole, you can add one of these hanging shelves to give you a bit more storage space. I have a few of these I have purchased from Walmart and I love them.
When my children were little I used a series of tote bags for keeping everything organized and ready to go out the door. I had a different color bag for every activity we had (library, church, PTA, work, beach). When I came across something, like a library book needing to be returned, I simply placed it in the correct bag and it was ready to go.
________________________________________________________________________
If you've been following the Monday Motivations in January you'll probably be looking at a nicely organized closet in your home right now.
There are a few items that I'd like to purchase for my closets as my budget allows. I thought I'd share them with you. If you have some items that work for you, please share them in the comment section.
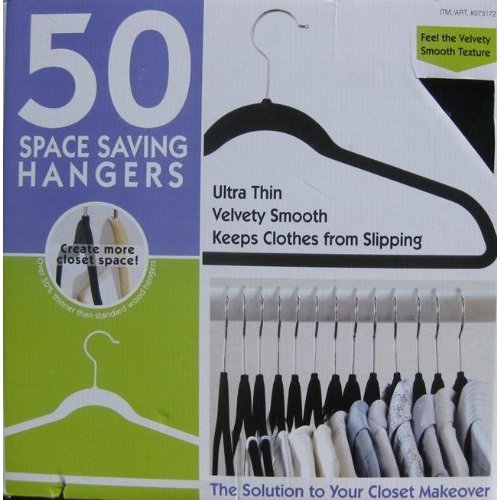
1. My first wish list item is the new skinny hangers, sometimes called Velvet Hangers. I found some at Ross for 50 cents a piece (they came in a package of 12). If your closet is crowded, these hangers will give you a little bit of extra room on your rod. You can also get them on Amazon.com.
2. Another item I like is the square utility totes from thirty-one. I got to play around with one last Fall and found that they were so much lighter than the heavy wooden ones I'm using now.

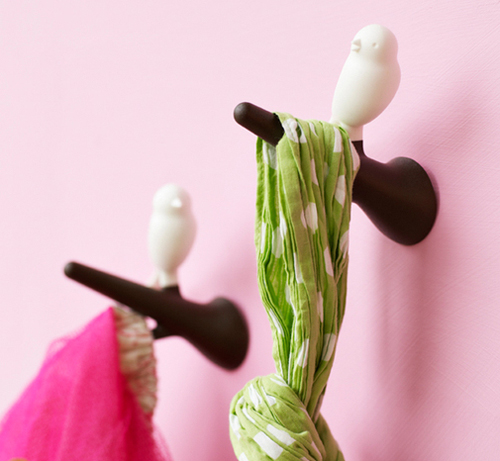
3. Lastly, I'd like to get a few of these cute hooks to put on the inside of the closet door. I just can't resist them!
So, how's your foyer and coat closet coming along? If you're really proud of it, send me some pics and I'll post them.
So if you're game, join me in going through the house again, getting everything ship-shape. Just look for the Monday Motivation post on the first Monday of each month. Don't forget to leave any comments or suggestions in the comment section (or email me) so we can all learn from each other.
Love your blog and your Monday motivations. You have inspired me to go room by room in my house and declutter and organize everything this year! Plan on blogging about some of the projects that I will tackle thanks to all your help and suggestions.
ReplyDelete