Organizing Christmas Wrap

 
I'm not ready to put away the Christmas decorations yet, but the Christmas wrappings were driving me nuts and I had to do something - and fast.
 
My studio had become the dumping ground for gifts and wrappings and it was a total mess.  Fortunately, I have a system, so it only took about 15 minutes to put everything away.
 
First, I gathered all of the bags, ribbons, wrapping paper, tags, and tissue paper together.  Then I sorted it by type on the floor.  I discarded anything that was damaged.
 
After everything was sorted I started to put each category of wrapping in it's storage place.
 
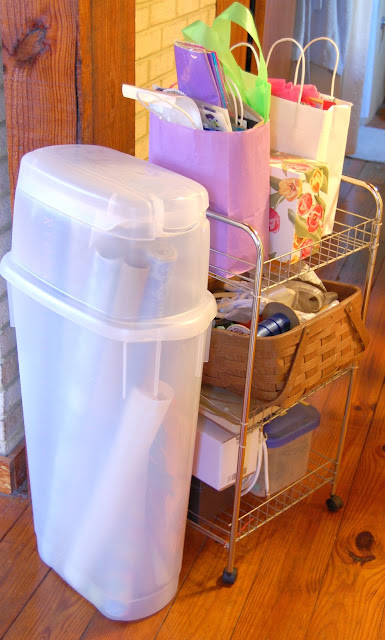
The tall rolls of wrapping, large bags, and collapsed boxes were filed into the bottom of the Rubbermaid wrapping container.  It's extra tall to accommodate the tall rolls of paper.
 
tidybrownwren.blogspot.com


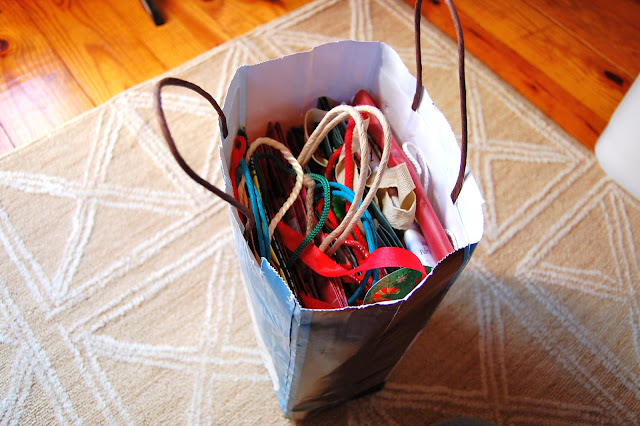
I always use a recycled gift bag that I don't want to use again and store the folded tissue paper and small gift bags in.

tidybrownwren.blogspot.com


Ribbon is folded and stored in a sturdy Christmas gift box.  I've used this box for about 10 years now.


tidybrownwren.blogspot.com


Another sturdy gift box holds tags, package decor, cards, and a few odd ribbons.

tidybrownwren.blogspot.com

Package filler (is that what you call it?) goes into Ziploc bags and then I squish the air out to save space.

tidybrownwren.blogspot.com


I add all of the small containers to the large storage container and put the lid on.  Done!

tidybrownwren.blogspot.com


I also took a few seconds to tidy up the regular wrapping that I use throughout the year.  I use wrinkled gift bags to store tissue paper (on the right) and gift bags (on the left).  The basket holds ribbon and package decor.  The tall Rubbermaid container holds all occasion wrapping paper and also contact paper. 

tidybrownwren.blogspot.com

All of these wrapping containers slide into my closet on the second floor for easy access.

Where do you store your wrappings?

Comments

Popular posts from this blog

How To Make Your Own Exercise Bike For Next To Nothing

Remember back in April when I had a kidney transplant?  Well, the kidney is doing great (thanks, Cathy , for taking such good care of it when you owned it).  There was one little glitch, however.  During surgery, the retractors they used caused some nerve damage in my right leg.  When I woke up from surgery, I couldn't move or feel my leg.  The docs felt like the feeling would come back but the paralysis had them stumped.  A visit to a neurologist ruled out a stroke and a CT scan showed some fluid which was pressing on L4 and L5 (medical talk which means I couldn't feel or move part of my leg).  The prognosis is good and I'm recovering pretty quickly.  In fact, I've left my cane behind and I'm walking freestyle without falling.  My next goal is to be able to drive. I've been itching to get back to exercising (physical therapy doesn't count) because my medication causes me to gain weight and I need to burn some calories.  Running? - nope.  Walking? - can&

A Designer's Secret For A Taller Bed

  Several years ago Hubs and I spent almost a year looking for a bedroom set that we both loved.  He wanted clean lines and dark wood.  I wanted curves and a "tall" bed.  Of course, there was no perfect bedroom set but we were able to compromise on a set that we both liked.  My main wish was for a bed that I could "climb up into".  The problem with that wish was that most of the "tall" beds were four poster beds and Hubs was not in the mood for that.  We found a Thomasville bed on display at a local furniture store and it fit the clean lines that Hubs wanted and it was "tall"  enough to suit me.  The problem was that once we received the bed we ordered in our home, it wasn't as tall as I had remembered it being.  My heart sunk!  I went back to the furniture store to look at the display.  Their bed was much taller than our bed.  Hmmm. . . what was different? I got nosey and lifted up the comforter on the bed.  It revealed their secret

Plans For A DIY Exercise Bike Stand

  Thank you to so many of you who emailed me about plans for the DIY Exercise Bike Stand .  I apologize that it has taken me so long to get the measurements to you, but they are finally here!   The wood was purchased at Home Depot and the bike pegs were purchased at Walmart in the bike section.    The bike we used for this project is a 24" 12 speed bike (I'm a shorty).  I used the hardest gear while riding, but this set-up does not allow you to really get much resistance (for building muscle).  It was great for getting my legs moving after some nerve damage.  I also wanted to burn calories and get my heart rate up and this did the trick.    If you have any questions, just shoot me an email.