Whew! I finally have a chance to post an update on our kitchen remodeling project.
There is lots of wood and dust, nails and screws, bricks and sand.
Here is a view into the kitchen from the "keeping room" area in front of the fireplace. We have an open concept house, so it's hard to describe. To the right, through the doorway, is our utility room. The large plaid object to the right is our stove covered with a blanket.
The ceiling is bead board and the walls are being prepped for board and batten.
Here is the same view after the painters came and after Hubs and I removed the brick flooring.
This view was taken from the doorway to the utility room. Notice the new beams and the board and batten siding. The old walls and ceiling had been sprayed with popcorn ceiling texture - I'm not kidding - yes, in a kitchen. Every morning I came down to get coffee and found popcorn texture on my counters and floor.
Here is the same shot after the painters left. The new beams will be covered with rough cut wood to match the beams in the rest of the house. This was not the original plan for beam placement, but we decided we could live with the mistake. I really wanted them to be up against the ceiling, but they were installed while we were away at work, and we decided that it was too much work to correct the mistake. We're learning to like them where they are.
Here is a view of the old sliding glass doors. They were old Anderson sliders that had warped and we could barely open them. I actually sealed off the one on the left by caulking around the whole thing and taking the inside handle off so it couldn't be opened.
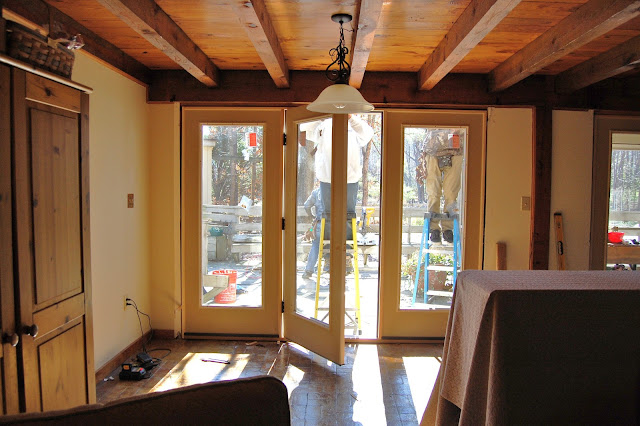
Here's the doorway to the back porch after the old door was removed. It was a very chilly day and I ran around the house with my winter coat on all day.
These new doors are ThermaTru and they are very heavy. Only the middle doors swing open.
We hope to get them stained tomorrow so we can get the new hardware on them (oil rubbed bronze, of course). We struggled with the decision to get these doors. We needed to get very sturdy, airtight doors, but by doing so we knew we would be losing some of our view with the wider door trim. We have a passive solar house, so it was hard to find a good door that could still have the passive solar rating. The doors will be stained to match the beams and trim in the rest of the house.
To save some money, Hubs and I decided to remove the brick flooring (only in the kitchen). It was a time consuming job and we were happy to save ourselves hundreds of dollars by doing it ourselves. There is no light in the kitchen, so we brought in a lamp from the living room. How romantic!
After taking up a few rows, we realized that:
1. We were getting quite a few bricks stacked up and they were getting in our way.
2. The shortest way out of the house with the bricks was the back door - which couldn't be used because the door hardware wasn't installed yet (it was screwed shut).
3. The flooring guys were coming in 2 days (which really ended up being 7 days).
Being the resourceful cheapos that we are, we decided to open the new kitchen window, carefully cover the new window trim with a blanket, and throw the old bricks out the window.
Half of the first few bricks we threw out broke and we had to come up with a new plan. We want to be able to use the bricks to pave the floor of the new greenhouse (on my wish list). We really like to recycle and we didn't want to break all of the bricks. So. . . Hubs got an extra piece of plywood and propped it up outside against the bottom of the window. Then we slid the bricks down the plywood and into a pile. We had 400 bricks pulled up and piled outside in less than 2 1/2 hours.
So, how did we do with all of our grandlittles at the house during one week of the remodel? Well, we did a lot of bouncing. Our little exercise rebounder is worth it's weight in gold. The boys thought all of the plastic sheets hanging up made a fun little fort and they looked forward to an occasional peek behind the plastic to see the progress. Eating "picnic style" on paper plates was also an added treat.
We should be getting our new floor tomorrow and getting the doors stained. Next week the cabinets are scheduled to be delivered and the counter top measurements taken for the granite. Hopefully we'll be done in 2 weeks. We'll see.


It's looking beautiful! I like the beam 'accident' and the ingenious idea for sliding the bricks out the window. Looking forward to seeing the finished product!
ReplyDeleteKelly, this is so exciting! Love the new doors!
ReplyDelete